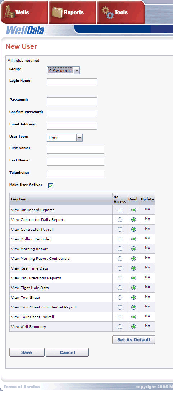
Create a New User
|
|
The following options are only available to users with administer status.
Create a New User
|
|
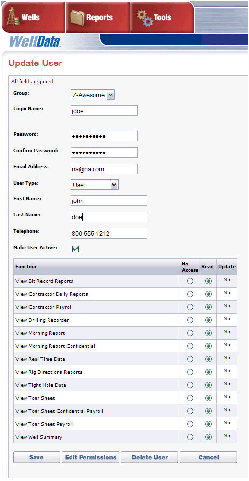
To edit a user’s access permissions, click Settings > Administer > User > Edit User.
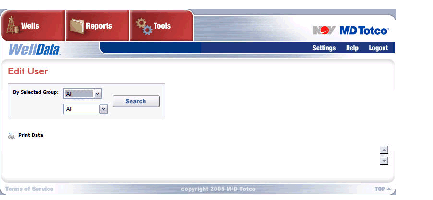
Select a Group type and name from the drop-down lists to view the users in a known group or Select a Group to search within and click Search
From the resulting list you may:
Update User ScreenEdit the user information and/or modify their level of access to each available function in the WellData application (in the table in the lower half of the screen) Click Save
Set the well or rig permissions by selecting or de-selecting the checkbox in the Permission column. A checked well/rig will display it to the user. Entering a Permission End Date will provide access to a particular well/rig until that saved date is reached. Click Save.
|
|
Click Settings > Administer > Division > Create Division to add a division to the selected contractor.
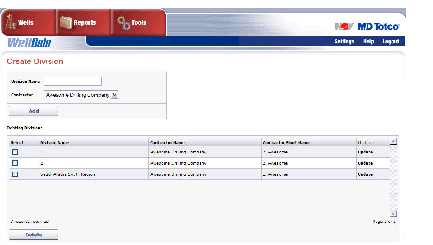
Once a division is added it is displayed in the Existing Divisions list. Check the box next to a division in the list and click Delete to remove it from the contractor list.
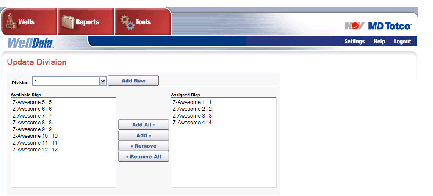
Click Settings > Administer > Division > Update Division to access the Update Division screen. Rigs can be assigned or re-assigned to a division in this window.
Click Add Division to display the Create Division screen previously detailed.
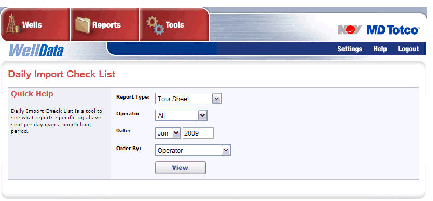
The Daily Import Check List is a tool that displays the reports (as a .pdf file) that selected rigs have sent each day over a month long period. To access the Import Check List:
Go to Settings > Administer > Import Check List
Enter the import parameters
Click View